Design of Trimming Die for Formed Parts with Flange
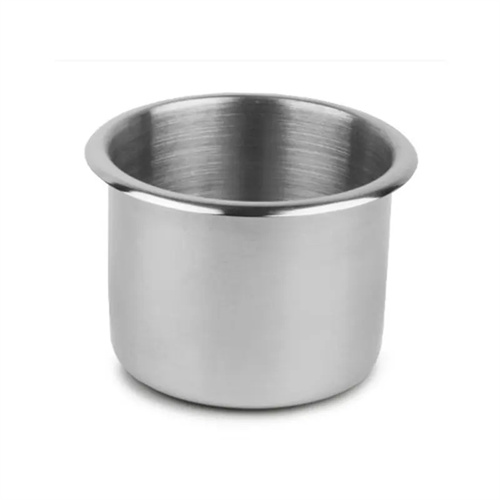
The design of trimming die for flanged formed parts is a special die technology for edge trimming of flanged parts after drawing or forming. The purpose is to remove excess material around the flange of the part to ensure the dimensional accuracy and end surface flatness of the flange. It is widely used in automotive panels, pressure vessels, daily necessities and other fields, such as cup-shaped parts and cylindrical parts with flanges. The flange part of such parts often has problems such as unevenness and dimensional deviation during the drawing process. The design quality of the trimming die directly affects the final quality of the part and the subsequent assembly accuracy. In the early stage of design, it is necessary to clarify the diameter, thickness, trimming height of the flange of the part and the matching requirements with other parts. For example, for a cylindrical part with a flange diameter of 120mm, a height of 10mm and a thickness of 2mm, it is necessary to determine that the flange diameter tolerance after trimming is controlled within ±0.1mm, and the end surface flatness error does not exceed 0.05mm.
The structure of the mold depends on the shape and size of the part, and mainly includes the upper mold (trimming punch), the lower mold (trimming die), the positioning device, the unloading device and the guiding device. The trimming punch and die are made of Cr12MoV material, and the hardness reaches HRC58-62 after quenching to ensure the sharpness and wear resistance of the cutting edge. The cutting edge diameter of the trimming die is equal to the design diameter of the flange of the part, and the cutting edge height is generally 2-3 times the material thickness to enhance the strength of the cutting edge and avoid chipping during trimming. The function of the trimming punch is to press the part against the die to prevent deformation of the part during trimming. Its lower end face needs to fit closely with the flange end face of the part, and the flatness error is controlled within 0.02mm/m. For large parts with flanges, in order to reduce the weight of the mold, the trimming punch can adopt a hollow structure, and the inside is filled with cast iron and other materials.
The design of the positioning device is the key to ensure the trimming accuracy of flanged formed parts, and it needs to be positioned according to the inner shape or outer shape of the part. If the inner shape accuracy of the part is high, the internal positioning method can be adopted, that is, a positioning mandrel is set in the lower die, and the diameter of the positioning mandrel is 0.02-0.05mm smaller than the inner diameter of the part to ensure that the part can be smoothly inserted and accurately positioned; if the outer shape accuracy of the part is high, the external positioning method is adopted, and a positioning block or a positioning ring is set, and the clearance with the outer circle of the part is controlled at 0.05-0.1mm. For flanged parts with a large height, an axial positioning device is also required, such as a positioning step on the lower die, to ensure that the axial position of the part is fixed during the trimming process, and the trimming height error is controlled within ±0.05mm. The working surface of the positioning device needs to be quenched to a hardness of HRC40-45 to improve its wear resistance and extend its service life.
Calculating trimming force and verifying mold strength are crucial steps in the design process. The magnitude of trimming force is related to the part’s flange circumference, material thickness, and tensile strength. The calculation formula is F = L × t × σb, where L is the flange circumference, t is the material thickness, and σb is the material tensile strength. For example, for a part with a flange circumference of 300mm, a thickness of 2mm, and made of Q235 (σb = 400MPa), the trimming force is approximately 300 × 2 × 400 = 240,000N, or 240kN. Based on this, the selected press tonnage should be no less than 300kN to ensure sufficient force for trimming. Furthermore, key mold components such as the trimming die, punch, and die base must be strength-verified. The die wall thickness must meet strength requirements, generally no less than 20mm. The die base should be made of HT300 cast iron and be at least 50mm thick to ensure no deformation under the trimming force.
The guiding, unloading and debugging and maintenance of the mold are equally important. The guiding device adopts a guide pin and guide sleeve structure. The diameter of the guide pin is selected from 25 to 40mm according to the mold size. The clearance between the guide sleeve and the guide pin is controlled at 0.01 to 0.03mm to ensure that the upper and lower molds are accurately aligned during the trimming process to avoid the trimming deviation of the parts caused by the misalignment of the cutting edge. The unloading device adopts an elastic unloading plate or unloading ring. After the trimming is completed, the parts are unloaded from the trimming punch. The size of the unloading force is adjusted by a spring or a nitrogen spring, which is generally 5% to 10% of the trimming force. When testing the mold, first use waste material for trial cutting to check the flange size and end face quality after trimming. If the size is out of tolerance, the cutting edge of the trimming die needs to be repaired; if the end face is uneven, the accuracy of the positioning device and the flatness of the punch need to be checked. In daily maintenance, clean the iron chips on the cutting edge every 1,000 times of work and check the wear of the cutting edge. When the wear exceeds 0.1mm, it needs to be repaired in time. The guide pins and guide sleeves need to be regularly filled with grease, and a precision test should be carried out every 5,000 operations to ensure that the guiding accuracy meets the requirements and extend the service life of the mold.
